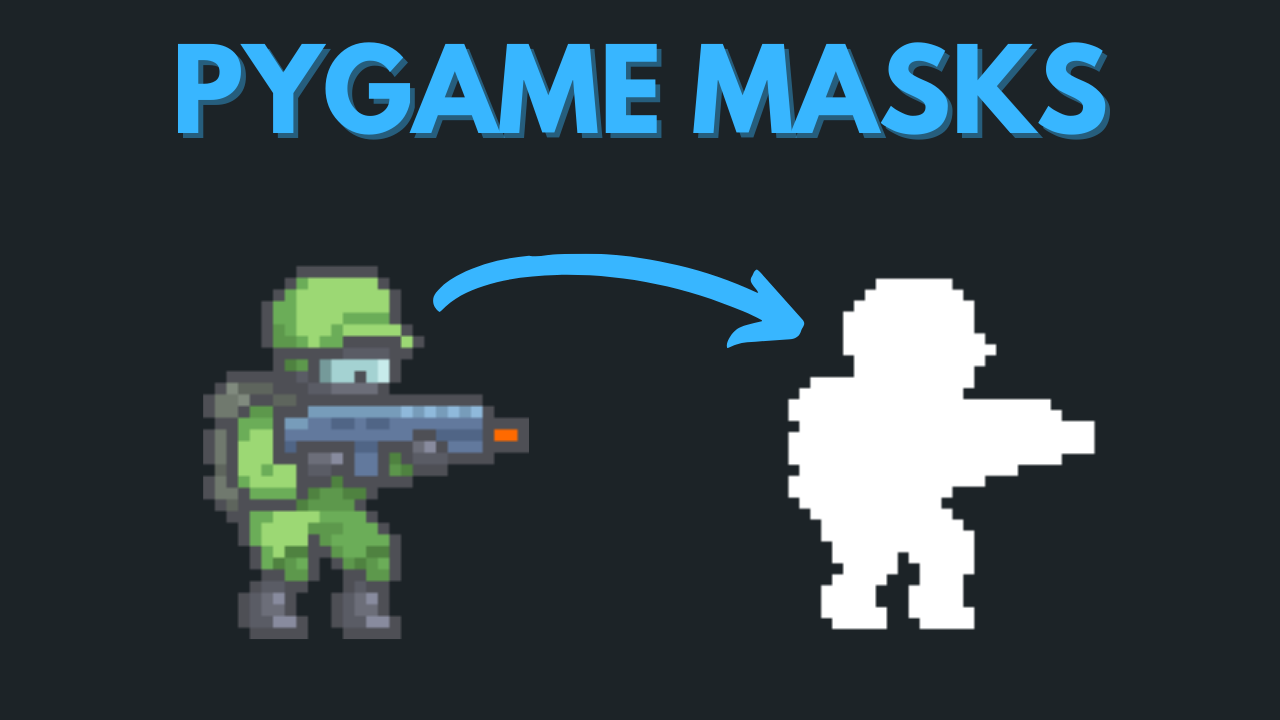
What Do Pygame Masks Do?
Using rectangles for collision is a very quick and efficient method and works for most cases, but the problem is that not all objects in a game are perfect rectangles. Take this soldier sprite for example.
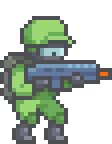
Using rectangle collision on this soldier sprite could give false positives because a collision would be detected with the boundary rectangle. So what do we do if we want to get more accurate collision checks?

Well one method would be to manually resize the overall rectangle to be more representative of the object, but this still leaves areas that give inaccurate collisions.

We could take it one step further and use a bunch of smaller rectangles, and this could be a good intermediate solution, but it could be time consuming to setup.

So to get pixel perfect collision where the image itself is checked, we can use masks.
There are two approaches we can use for this and we’ll look at both in more detail below. This starter code will be used for both methods:
					import pygame

pygame.init()

#define screen size
SCREEN_WIDTH = 800
SCREEN_HEIGHT = 600

#create game window
screen = pygame.display.set_mode((SCREEN_WIDTH, SCREEN_HEIGHT))
pygame.display.set_caption("Masks")

#define colours
BG = (0, 0, 0)
GREEN = (0, 255, 0)
RED = (255, 0, 0)
BLUE = (0, 0, 255)
WHITE = (255, 255, 255)

#hide mouse cursor
pygame.mouse.set_visible(False)

#game loop
run = True
while run:

  #update background
  screen.fill(BG)

  #event handler
  for event in pygame.event.get():
    if event.type == pygame.QUIT:
      run = False

  #update display
  pygame.display.flip()

pygame.quit()
Using Mask Overlap
The first approach checks for an overlap between two masks. I load in a sprite of a soldier, create a rectangle and a mask of the image using the code below:
					#create soldier
soldier = pygame.image.load("soldier.png").convert_alpha()
soldier_rect = soldier.get_rect()
soldier_mask = pygame.mask.from_surface(soldier)
mask_image = soldier_mask.to_surface()
Notice that in the code above I am creating a mask_image variable. This isn’t necessary in a finished game but will allow us to draw the mask on the screen to check it worked as expected.
To do this, add screen.blit(mask_image, (0, 0)) to the game loop and you should see this:

I’ll repeat the process for a second object, which we’ll call the bullet. Rather than loading in a sprite, I create a square surface and create a mask of it.
					#create bullet and mask
bullet = pygame.Surface((10, 10))
bullet.fill(RED)
bullet_mask = pygame.mask.from_surface(bullet)
I then get the mouse coordinates by adding pos = pygame.mouse.get_pos()at the start of the game loop. Then I draw the bullet at those coordinates using screen.blit(bullet, pos).
Finally, to check for collision between the two masks, we check for overlap using .overlap(other, offset). This function takes a couple arguments:
other, which is the mask to check for an overlap withoffset, which is the difference between thexandycoordinates of the two masks’ origins (top left corner coordinates). This is visualised in the screenshot below.

The soldier mask’s origin is at (0, 0), while the bullet is positioned at the mouse cursor, which is stored in variable pos. The offset can be calculated as the difference in the x coordinates pos[0] - 0 and the difference in the y coordinates pos[1] - 0. So to check for the overlap, we just need to pass in the coordinates of the bullet as an offset between the two masks like so:
if soldier_mask.overlap(bullet_mask, (pos[0], pos[1])):
As a way of confirming that the collision has been detected, I will change the colour of the bullet using a col variable. If a collision is detected, it will change from green to red. This is accomplished by expanding the overlap code as below:
					if soldier_mask.overlap(bullet_mask, (pos[0], pos[1])):
  col = RED
else:
  col = GREEN
We then use the col variable to change the colour of the bullet just before it is blitted with bullet.fill(col)
The updated code then becomes:
					import pygame

pygame.init()

#define screen size
SCREEN_WIDTH = 800
SCREEN_HEIGHT = 600

#create game window
screen = pygame.display.set_mode((SCREEN_WIDTH, SCREEN_HEIGHT))
pygame.display.set_caption("Masks")

#define colours
BG = (0, 0, 0)
GREEN = (0, 255, 0)
RED = (255, 0, 0)
BLUE = (0, 0, 255)
WHITE = (255, 255, 255)

#hide mouse cursor
pygame.mouse.set_visible(False)

#create soldier
soldier = pygame.image.load("soldier.png").convert_alpha()
soldier_rect = soldier.get_rect()
soldier_mask = pygame.mask.from_surface(soldier)
mask_image = soldier_mask.to_surface()

#create bullet and mask
bullet = pygame.Surface((10, 10))
bullet.fill(RED)
bullet_mask = pygame.mask.from_surface(bullet)

#game loop
run = True
while run:

  #get mouse coordinates
  pos = pygame.mouse.get_pos()

  #update background
  screen.fill(BG)

  #check mask overlap
  if soldier_mask.overlap(bullet_mask, (pos[0], pos[1])):
    col = RED
  else:
    col = GREEN

  #draw mask image
  screen.blit(mask_image, (0, 0))

  #draw rectangle
  bullet.fill(col)
  screen.blit(bullet, pos)

  #event handler
  for event in pygame.event.get():
    if event.type == pygame.QUIT:
      run = False

  #update display
  pygame.display.flip()

pygame.quit()
You should now be able to move the bullet rectangle to the soldier and observe the bullet colour changing when it comes in contact with the soldier’s mask, giving a very precise collision check.


This works well but what happens if the image is moved? Let’s update the soldier rectangle’s x andy coordinates above the game loop. We also need to blit the soldier image to show it at the new coordinates.
Add this code just before the game loop:
					#position soldier rectangle
soldier_rect.topleft = (350, 250)
And add this code just after the mask_image is blitted onto the screen
					#draw soldier
screen.blit(soldier, soldier_rect)

You should end up with the soldier positioned at the coordinates provided, while the mask is still in the top left corner. If you hover the bullet over them both you will notice that the collision isn’t being detected on the soldier’s new position. The reason this doesn’t work is because the mask origin is still at (0, 0) despite the image being moved. To account for this, the updated image coordinates need to be included in the offset of the mask.overlap() check.
if soldier_mask.overlap(bullet_mask, (pos[0], pos[1])):
Becomes:
if soldier_mask.overlap(bullet_mask, (pos[0] - soldier_rect.x, pos[1] - soldier_rect.y))
And now you should have pixel perfect collision with the soldier image wherever it is positioned on the screen. The final code becomes:
					import pygame

pygame.init()

#define screen size
SCREEN_WIDTH = 800
SCREEN_HEIGHT = 600

#create game window
screen = pygame.display.set_mode((SCREEN_WIDTH, SCREEN_HEIGHT))
pygame.display.set_caption("Masks")

#define colours
BG = (0, 0, 0)
GREEN = (0, 255, 0)
RED = (255, 0, 0)
BLUE = (0, 0, 255)
WHITE = (255, 255, 255)

#hide mouse cursor
pygame.mouse.set_visible(False)

#create soldier
soldier = pygame.image.load("soldier.png").convert_alpha()
soldier_rect = soldier.get_rect()
soldier_mask = pygame.mask.from_surface(soldier)
mask_image = soldier_mask.to_surface()

#create bullet and mask
bullet = pygame.Surface((10, 10))
bullet.fill(RED)
bullet_mask = pygame.mask.from_surface(bullet)

#position soldier rectangle
soldier_rect.topleft = (350, 250)

#game loop
run = True
while run:

  #get mouse coordinates
  pos = pygame.mouse.get_pos()

  #update background
  screen.fill(BG)

  #check mask overlap
  if soldier_mask.overlap(bullet_mask, (pos[0] - soldier_rect.x, pos[1] - soldier_rect.y)):
    col = RED
  else:
    col = GREEN

  #draw mask image
  screen.blit(mask_image, (0, 0))

  #draw soldier
  screen.blit(soldier, soldier_rect)

  #draw rectangle
  bullet.fill(col)
  screen.blit(bullet, pos)

  #event handler
  for event in pygame.event.get():
    if event.type == pygame.QUIT:
      run = False

  #update display
  pygame.display.flip()

pygame.quit()
Using The spritecollide() method
The second method of mask collision uses the spritecollide() method and is suitable when there are many components that you need to check collision with. It requires the use of classes so I have updated the code from before to create a class for the soldier and the bullets.
					#create soldier class
class Soldier(pygame.sprite.Sprite):
  def __init__(self, x, y):
    pygame.sprite.Sprite.__init__(self)
    self.image = pygame.image.load("soldier.png").convert_alpha()
    self.rect = self.image.get_rect()
    self.rect.topleft = (x, y)
    self.mask = pygame.mask.from_surface(self.image)

#create bullet class
class Bullet(pygame.sprite.Sprite):
  def __init__(self):
    pygame.sprite.Sprite.__init__(self)
    self.image = pygame.Surface((10, 10))
    self.rect = self.image.get_rect()
    self.image.fill(RED)
    self.mask = pygame.mask.from_surface(self.image)

  def update(self, colour):
    pos = pygame.mouse.get_pos()
    self.rect.center = (pos)
    self.image.fill(colour)
The logic in the code above is the same as before. I create or load in an image then create a rectangle and mask from it. The Bullet class also has an update method to reposition at the mouse cursor and change colour as before.
I then create an instance of each and put them into their own groups.
					#create instances of soldier and bullet
soldier = Soldier(350, 250)
bullet = Bullet()

#create soldier and bullet groups
soldier_group = pygame.sprite.Group()
bullet_group = pygame.sprite.Group()

#add instances to groups
soldier_group.add(soldier)
bullet_group.add(bullet)
I can then change out the collision check from looking for an overlap to using the spritecollide(sprite, group, dokill, collided) method, which takes the following arguments:
spriteis the main sprite to do the collision check ongroupis the sprite group to check for collision againstdokillwill delete the sprite from the group if collision is detectedcollidedis a callback function to specify what collision method to use. By default this uses rectangle collision.
This checks for collision between a sprite and a group of sprites using their rectangles by default. To make sure it uses their masks, the fourth argument collide_mask is specified.
The full code then becomes:
					import pygame

pygame.init()

#define screen size
SCREEN_WIDTH = 800
SCREEN_HEIGHT = 600

#create game window
screen = pygame.display.set_mode((SCREEN_WIDTH, SCREEN_HEIGHT))
pygame.display.set_caption("Masks")

#define colours
BG = (0, 0, 0)
GREEN = (0, 255, 0)
RED = (255, 0, 0)
BLUE = (0, 0, 255)
WHITE = (255, 255, 255)

#create soldier class
class Soldier(pygame.sprite.Sprite):
  def __init__(self, x, y):
    pygame.sprite.Sprite.__init__(self)
    self.image = pygame.image.load("soldier.png").convert_alpha()
    self.rect = self.image.get_rect()
    self.rect.topleft = (x, y)
    self.mask = pygame.mask.from_surface(self.image)

#create bullet class
class Bullet(pygame.sprite.Sprite):
  def __init__(self):
    pygame.sprite.Sprite.__init__(self)
    self.image = pygame.Surface((10, 10))
    self.rect = self.image.get_rect()
    self.image.fill(RED)
    self.mask = pygame.mask.from_surface(self.image)

  def update(self, colour):
    pos = pygame.mouse.get_pos()
    self.rect.center = (pos)
    self.image.fill(colour)

#hide mouse cursor
pygame.mouse.set_visible(False)

#create instances of soldier and bullet
soldier = Soldier(350, 250)
bullet = Bullet()

#create soldier and bullet groups
soldier_group = pygame.sprite.Group()
bullet_group = pygame.sprite.Group()

#add instances to groups
soldier_group.add(soldier)
bullet_group.add(bullet)

#game loop
run = True
while run:

  #update background
  screen.fill(BG)

  if pygame.sprite.spritecollide(bullet, soldier_group, False, pygame.sprite.collide_mask):
    col = RED
  else:
    col = GREEN

  bullet_group.update(col)

  soldier_group.draw(screen)
  bullet_group.draw(screen)

  #event handler
  for event in pygame.event.get():
    if event.type == pygame.QUIT:
      run = False

  #update display
  pygame.display.flip()

pygame.quit()
If all goes well, you should be getting the same pixel perfect collision as before.
Since mask collision requires more processing time, using it to check collision with many items at once could slow down your game. One approach to improve the performance is to first of all check for rectangle collision since that is faster, and then, if a collision is detected, go to the next level of detail by checking for mask collision.
To accomplish this, we modify the collision code as below. Remember – if we don’t specify the fourth argument in spritecollide() then it will by default check for rectangle collision, which is what we want in the first check.
					if pygame.sprite.spritecollide(bullet, soldier_group, False):
  col = BLUE
  if pygame.sprite.spritecollide(bullet, soldier_group, False, pygame.sprite.collide_mask):
    col = RED
  else:
col = GREEN
You can also draw the soldier’s rectangle to better visualise this collision check by adding pygame.draw.rect(screen, WHITE, soldier.rect, 1) in the game loop.
If all went well, you should have a green bullet rectangle, which turns blue when you move it into the soldier’s rectangle and then turns red when it touches the soldier sprite.
How do I make this not lag?
Mask collision is slower than rect collision so if you use it on too many sprites then it will affect performance. You could use rect collision first as a quick check and if rect collision is detected then you apply mask collision for a more accurate check. That way you’re not checking for mask collision every loop
Hi Russ, I appreciate your video, but need a little help here.
For some reason pygame is treating the whole rectangle as the mask. When I blit the mask it’s a rectangle, not a soldier outline
Does this have to do with creating part of the image as transparent?
Hi Jason, I haven’t tested it with an image that doesn’t have transparency but I expect that is what is happening. If you are using a .png with transparency, you would need to make sure to add .convert_alpha() on the end of the pygame.image.load() function to maintain that transparency. The mask should then work correctly.
Hi Russ,
I guess I’m not understanding the concept overall. Is the transparent section the area outside or inside the mask?
I used the snipping tool to make a copy of the image. How did you originally create the image with transparency?
Hi Jason, the transparent area is the area outside of the mask and it’s the outline of the image. The reason it works when you use the soldier image directly but doesn’t work if you use the snipping tool is because the snipping tool will treat all those white pixels around the soldier as part of the image. So to you and I it will look like there is nothing there but the image has a white pixel there so the mask won’t work. I use the software GIMP for doing some image editing, and that can be used to add transparency.
I noticed when I used the image directly from your site, it worked correctly, so it must be about the transparency. Which software did you use to create your images?
hi Russ , i used mask on the whole level , i load my level as a png then mask the whole thing for collision , but i heard you say that mask slow done the game , so i dont know how to fix this
issue and still keep my level with collision