Introduction
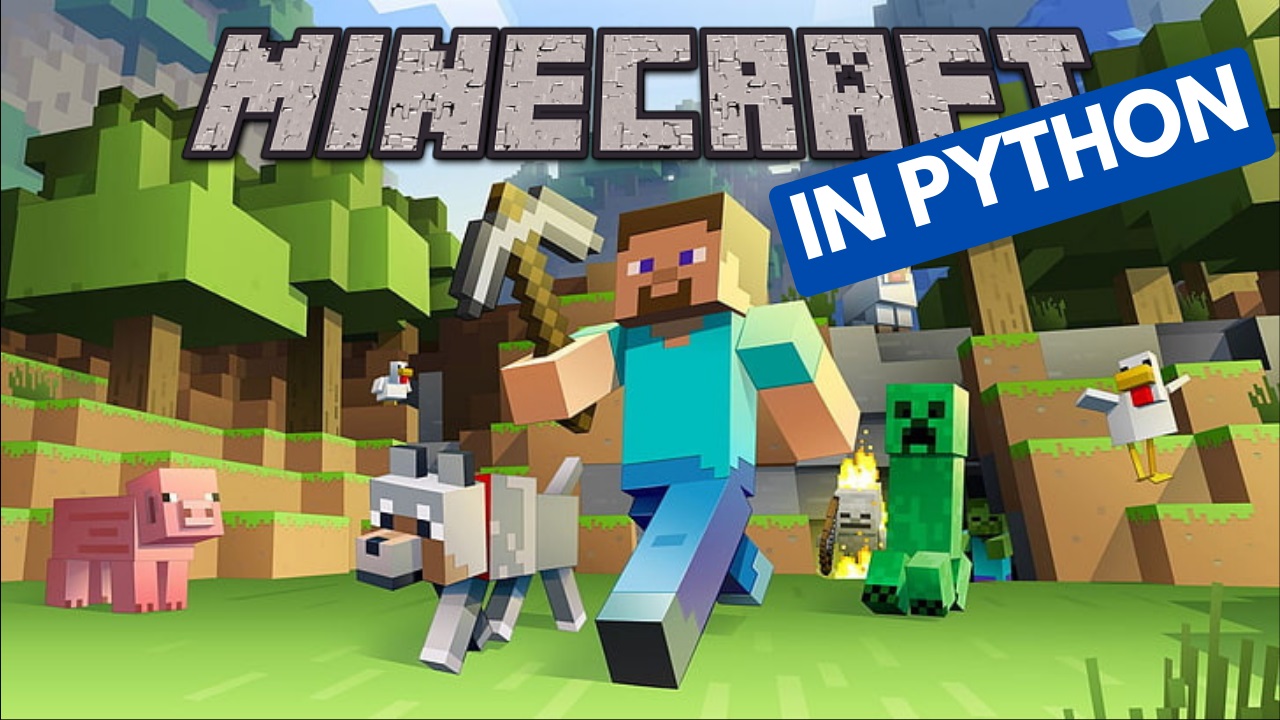
In this tutorial you will learn how to make minecraft in python using the ursina library. The tutorial will take you through the entire process and we will build the game from scratch using open source assets with the end result looking something like this.
How Do You Make Minecraft In Python?
There are many different ways of making a game like minecaft in python. The approach we will take here will be done in the following steps:
- Install ursina and perlin noise libraries
- Create a class for each block that makes up the world
- Create a world using these blocks
- Apply perlin noise to the world to give it hills and valleys
- Create a player to move around the map with
- Take inputs from left and right click to place or destroy blocks.
What is Ursina?
Ursina is a Python library used for game development but one of its key features is that it can be used to develop 3D games. Additionally, as it is more of a game engine, it already includes a lot of existing classes and ‘prefabs’, allowing us to develop a game very quickly with few lines of code. In fact this minecraft example is going to be done in less than 100 lines!
What you will learn:
If you have worked with pygame before, then you will notice quite a few differences in how ursina works and will need to learn some new concepts such as:
- Entities: Anything created inside ursina, including the player, enemies, the level and even the camera and lights are all Entities. These can have a lot of attributes such as position, rotation, model, texture as well as their own methods.
- FirstPersonController: Typically in a first person 3d game you would need to setup the camera, add controls to it to be able to move around and rotate the camera, jumping, collision, etc. This is where ursina’s FirstPersonController prefab comes in handy as it is an existing class inside ursina that contains the code for all those features already, saving a ton of work.
- Using 3D models and textures: We will keep the models simple in this game and use a cube for all the blocks, but by applying different textures to it, we will be able to create different types of blocks with the same model.
- Random Map Generation: We will use perlin noise to be able to quickly generate random game maps that have gradual slopes to make the map look more natural.
Prerequisites
- Basic Python Knowledge: This is a beginner / intermediate tutorial and I will explain all of the concepts in detail, but being familiar with python concepts such as
forloops,ifstatements as well asdictionaries, will make it much easier to follow.
Starter Files
There are a number of open source assets that I used for this game, all of which are linked below. You can replace these with your own if you like, but this may require modifications to the code so if you run into issues, it may be best to revert to the original assets to be able to finish the tutorial.
I’ve included the assets as well as the empty starter file in this folder, which you can use to save some time:
Credits for Assets Used
I use open source assets in all my tutorials so it is only fair that the original creators are credited:
Project Setup
Before we get started, there are a couple of libraries that need to be installed. The easiest way to do this would be using pip:
- Open up the command prompt terminal
- Install ursina with “pip inistall ursina”
- Install perlin noise using “pip install perlin_noise”
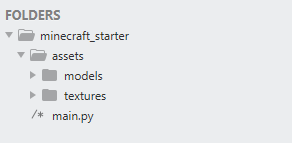
Next, setup your project folder as in the screenshot below. If you downloaded the starter files from above then it will be setup like this already:
Initialise Ursina
Setting up a game in ursina doesn’t require a lot of code.
In the snippet below we begin by importing the ursina library, then create a standalone ursina app and finally run it.
If you execute the code, you should get a game window, which for now is blank.
					#import the ursina library
from ursina import *

#create an instance of the Ursina app
app = Ursina()
##
##GAME CODE WILL GO BETWEEN THESE LINES
##
#run the app
app.run()
Create Map
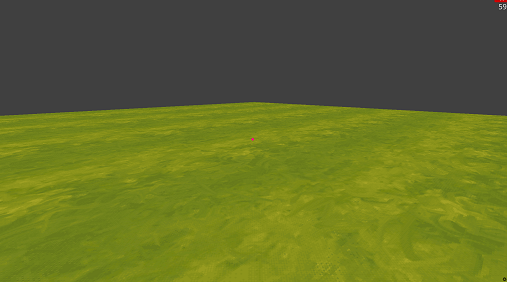
Next we can begin building up the 3d world.
First we will create a ground for the player to walk around on. Since all the objects in ursina are entities, we will create the ground as an entity too. We will pass a few arguments such as:
- Model: This can be a 3d model that you import into the game or it can be one of the preset models available in ursina. In this case I use the preset plane model to get a flat rectangular plane which will be our ground.
- Scale: This specifies the size of the plane in the x, y and z directions.
- Texture & texture scale: Similarly to the model, here we use a preset grass texture to apply to the ground. We then apply a scale to this.
- Collider: Ursina can handle collision for us but it will only check for collision with objects that have a collider assigned. Different shapes can use different collider types, but for simple collision, a box collider would give good results without slowing down the game.
					#create the ground
ground = Entity(
    model="plane",
    scale=(100, 1, 100),
    texture="grass",
    texture_scale=(10, 10),
    collider="box"
    )
Create Player
At this point we still can’t see anything on the screen, so the next thing to do is add a player. Ursina makes this easy as there is a pre fabricated player object that we can import and drop straight into the game.
In the code below we first import the FirstPersonControllerand then use it to create the player. This can take various arguments, but I am only passing in an argument to increase the mouse sensitivity.
Now if you run this code you will be able to look around, move the player and jump. Collision is also being handled automatically and that’s what prevents the player falling through the ground.
					#add this line just after the initial ursina import
from ursina.prefabs.first_person_controller import FirstPersonController

#ADD THIS CODE AFTER app = Ursina()
#create player
player=FirstPersonController(
  mouse_sensitivity=Vec2(100, 100),
  position=(0, 5, 0)
  )
The mouse gets locked to the center of the screen making it impossible to close the game window down.
Use the shortcut SHIFT + Q to close down the game at this point.
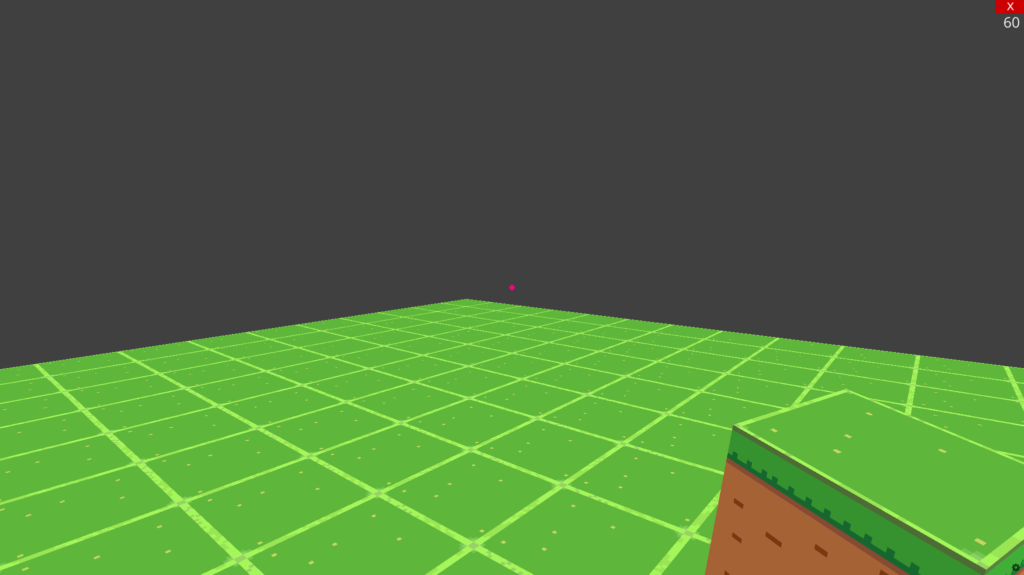
At this point your game should look like this.
Add Minecraft Blocks
Next we will create the individual blocks that will make up the world.
These will also be entities but since I will need them to store some additional information, I will set them up as python classes and inherit from the Entity class.
We will create the blocks in two stages:
- Load in the different textures and store them in a dictionary. This will allow us to use a common block model, but change the appearance using the different textures.
- Create a
Blockclass, which will inherit from theEntityclass. This will use a specific block model, which is loaded in from the assets folder. The texture is then assigned based on theblock_typevariable.
					block_textures = {
  "grass": load_texture("assets/textures/groundEarth.png"),
  "dirt": load_texture("assets/textures/groundMud.png"),
  "stone": load_texture("assets/textures/wallStone.png"),
  "bedrock": load_texture("assets/textures/stone07.png")
}

class Block(Entity):
  def __init__(self, position, block_type):
    super().__init__(
      position=position,
      model="assets/models/block_model",
      scale=1,
      origin_y=-0.5,
      texture=block_textures.get(block_type),
      collider="box"
      )
    self.block_type = block_type
Now we can replace the current map with these blocks. Remove the code that we previously used for creating the ground and instead we will use a for loop to generate a new ground from these blocks.
					#create world
for x in range(-10, 10):
  for z in range(-10, 10):
      block = Block((x, 0, z), "grass")
Add Blocks to Player Inventory
Next we will add a little block that the player will carry in their hand for placing down in the world.
First we define a variable to track what block type is currently selected. By default this will be set to a grass block.
					app = Ursina()

#define game variables
selected_block = "grass"

....
Then we create a mini block as an entity. Place this code just under the Block class.
The mini block is created in the same way as the main blocks, with a model and texture, but notice that this time we define a parent variable. By setting this to camera we “stick” the block to the camera so as the player moves and looks around, the block moves with it giving the impression that the player is carrying it.
					class Block(Entity):
    ....

mini_block = Entity(
  parent=camera,
  model="assets/models/block_model",
  texture=block_textures.get(selected_block),
  scale=0.2,
  position=(0.35, -0.25, 0.5),
  rotation=(-15, -30, -5)
  )
Placing and Breaking Blocks
Now we can start placing down and breaking blocks. Events such as mouse clicks and key presses are automatically handled by ursina’s engine so we just need to check for specific keys and clicks to trigger our code.
This is done inside a default input function that exists in ursina for this purpose. It must be passed the key argument to work. We will add this function right at the end of our code, before we run the app.
					def input(key):
  #place block
  if key == 'left mouse down':
    hit_info = raycast(camera.world_position, camera.forward, distance=10)
    if hit_info.hit:
      block = Block(hit_info.entity.position + hit_info.normal, selected_block)
  #delete block
  if key == 'right mouse down' and mouse.hovered_entity:
    if not mouse.hovered_entity.block_type == "bedrock":
      destroy(mouse.hovered_entity)

app.run()
There’s a lot going on in this code so we’ll break it into steps. Firstly we check for a left click, which placed new blocks and is done in this order:
- Check for a left click
- Cast a ray from the
camerain theforwarddirection to a distance of10units and check if that ray hits anything. If it does, store that in thehit_infovariable. - If
hit_infohas recorded a hit, then create a new block at the position of that hit entity and place the new block on the intersecting face (normal), using the texture of the currentselected_block
The second part of this function is checking for a right click, which allows us to destroy blocks. This is done in the following order:
- Check for a right click and simultaneously check if the mouse is hovering over an entity.
- Check to make sure that entity isn’t bedrock, since we want bedrock to be unbreakable.
- If all those checks pass, then destroy the entity
You might be wondering why placing blocks uses a raycaster but destroying blocks seems simpler by just checking if the mouse hovers over an entity.
When placing a block, we need to know which side of the existing block we are clicking on. The mouse.hovered_entity check can tells us that the mouse is over an entity but doesn’t tell us which face it’s hovering over. The raycaster on the other hand can give us all this detail, which is why it is used for creating blocks.
Placing Different Block Types
Next lets add the ability to change the type of block we are placing down.
We already have a selected_block variable so we just need a way of changing it in game.
Modify the input method with the highlighted code below, which will change the block type using the number keys 1, 2 and 3.
Also note that at the start of the method we need to call in the selected_block variable as a global variable.
Lastly, to change the type of block the player is carrying, we use the default update method to update that mini blocks texture accordingly.
					def input(key):
  global selected_block
  #place block
  if key == 'left mouse down':
    hit_info = raycast(camera.world_position, camera.forward, distance=10)
    if hit_info.hit:
      block = Block(hit_info.entity.position + hit_info.normal, selected_block)
  #delete block
  if key == 'right mouse down' and mouse.hovered_entity:
    if not mouse.hovered_entity.block_type == "bedrock":
      destroy(mouse.hovered_entity)
  #change block type
  if key == '1':
    selected_block = "grass"
  if key == '2':
    selected_block = "dirt"
  if key == '3':
    selected_block = "stone"

def update():
  mini_block.texture=block_textures.get(selected_block)
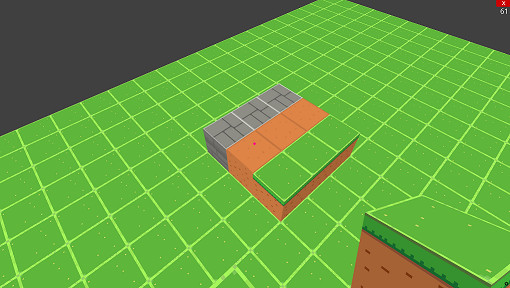
You should now be able to place down three different block types like this:
Creating Random Terrain
To give the terrain some hills and valleys, we need to randomise the height of each block. For this we will use perlin noise as it allows us to create a smooth transition between heights.
Update the top of the code to load the modules and generate some perlin noise that will be stored in variable noise. I’ve highlighted the new lines to add to the existing code below.
					from ursina import *
from ursina.prefabs.first_person_controller import FirstPersonController
from perlin_noise import PerlinNoise
import random

noise = PerlinNoise(octaves=3,seed=random.randint(1,1000))
Next, modify the world creation code from before to generate y coordinates for each block based on this perlin noise.
					#create world
for x in range(-10, 10):
  for z in range(-10, 10):
    height = noise([x * .02,z * .02])
    height = math.floor(height * 7.5)
    block = Block((x, height, z), "grass")
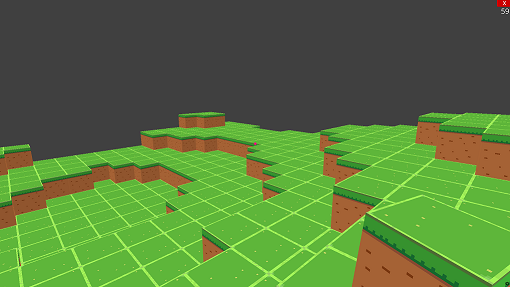
The result will be a map with different levels of height. And thanks to the random module, each time you run this code, the map will be different.
Creating Multiple Levels of Terrain
If you tried digging through any of the blocks, you will notice that there is nothing underneath them and there isn’t anything further to dig. Let’s fix that by adding an overall depth to the level.
In addition to that, we will change the block type based on the depth. Update the world creation code once more to match the code below.
					#create world
min_height = -5
for x in range(-10, 10):
  for z in range(-10, 10):
    height = noise([x * .02,z * .02])
    height = math.floor(height * 7.5)
    for y in range(height, min_height - 1, -1):
      if y == min_height:
        block = Block((x, y + min_height, z), "bedrock")
      elif y == height:
        block = Block((x, y + min_height, z), "grass")
      elif height - y > 2:
        block = Block((x, y + min_height, z), "stone")
      else:
        block = Block((x, y + min_height, z), "dirt")
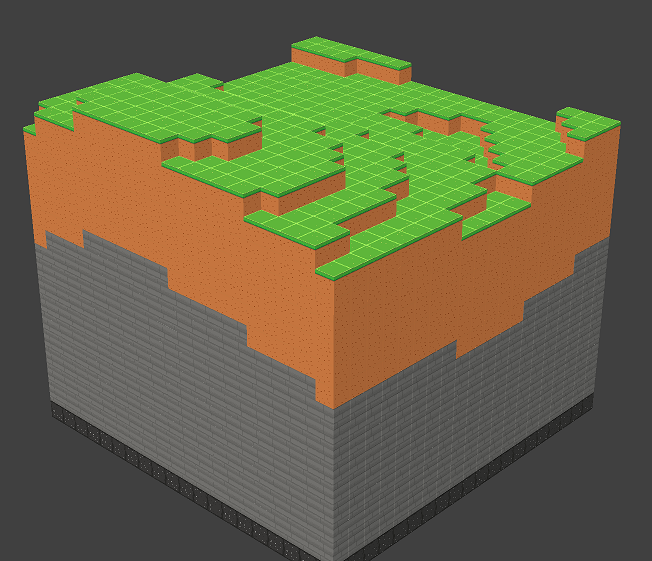
You should now have a level that is 5 blocks deep (this is based on the min_height variable) and as you dig down, you will encounter dirt, stone and finally bedrock.
You can increase the depth of the level by increasing the min_height variable, but it will slow down the game as you add more blocks.
This screenshot shows the map with 15 levels of depth.
Conclusion
And with that, you should now have a basic game with minecraft style building functionality.
Using a library like ursina allow us to put together something like this with relatively few lines of code since a lot of the functionality is already coded into the engine.
While this minecraft demo is playable in its current state, it isn’t scalable, meaning that making a full size world wouldn’t be possible with this approach as it would be far too resource intensive.
The full code is below.
					#import the ursina library
from ursina import *
from ursina.prefabs.first_person_controller import FirstPersonController
from perlin_noise import PerlinNoise
import random

noise = PerlinNoise(octaves=3,seed=random.randint(1,1000000))

#create an instance of the Ursina app
app = Ursina()

#define game variables
selected_block = "grass"

#create player
player=FirstPersonController(
  mouse_sensitivity=Vec2(100, 100),
  position=(0, 5, 0)
  )

block_textures = {
  "grass": load_texture("assets/textures/groundEarth.png"),
  "dirt": load_texture("assets/textures/groundMud.png"),
  "stone": load_texture("assets/textures/wallStone.png"),
  "bedrock": load_texture("assets/textures/stone07.png")
}

class Block(Entity):
  def __init__(self, position, block_type):
    super().__init__(
      position=position,
      model="assets/models/block_model",
      scale=1,
      origin_y=-0.5,
      texture=block_textures.get(block_type),
      collider="box"
      )
    self.block_type = block_type

mini_block = Entity(
  parent=camera,
  model="assets/models/block_model",
  texture=block_textures.get(selected_block),
  scale=0.2,
  position=(0.35, -0.25, 0.5),
  rotation=(-15, -30, -5)
  )

#create world
min_height = -5
for x in range(-10, 10):
  for z in range(-10, 10):
    height = noise([x * .02,z * .02])
    height = math.floor(height * 7.5)
    for y in range(height, min_height - 1, -1):
      if y == min_height:
        block = Block((x, y + min_height, z), "bedrock")
      elif y == height:
        block = Block((x, y + min_height, z), "grass")
      elif height - y > 2:
        block = Block((x, y + min_height, z), "stone")
      else:
        block = Block((x, y + min_height, z), "dirt")

def input(key):
  global selected_block
  #place block
  if key == 'left mouse down':
    hit_info = raycast(camera.world_position, camera.forward, distance=10)
    if hit_info.hit:
      block = Block(hit_info.entity.position + hit_info.normal, selected_block)
  #delete block
  if key == 'right mouse down' and mouse.hovered_entity:
    if not mouse.hovered_entity.block_type == "bedrock":
      destroy(mouse.hovered_entity)
  #change block type
  if key == '1':
    selected_block = "grass"
  if key == '2':
    selected_block = "dirt"
  if key == '3':
    selected_block = "stone"

def update():
  mini_block.texture=block_textures.get(selected_block)

#run the app
app.run()
i cant install this ursina extension, when i tried it said it was successful but it doesn’t work, it crashed the ursina window
I cant use the other blocks!!!!